There is little more frustrating these days than not being able to connect to WiFi. “No Service” areas are becoming less and less frequent these days, but for the frequent traveler off the beaten path, this is of no consolation. We have found ourselves inside Starbucks, or Tim Horton’s, struggling to get even Facebook to pull up, let alone upload large amounts of code to test. Since our ability to travel depends 100% on having a strong Internet connection, we decided to check out the Winegard ConnecT 2.0 WiFi Extender, The Winegard ConnecT 2.0 is designed to take weak WiFi signals and boost them for better reception inside the RV. Read on for our simple solution for the big question, How To Get WiFi In An RV.

Full-time travel has given our family so much excitement, adventure and next level educational exploits. I can’t help but be thankful for this blessed life we are living. I think often about all the decisions that have brought us to this point, not the least of which, my career as a software engineer. Were it not for the flexibility of the tech world, we would not be able to travel the globe in search of the extraordinary.
But, as with all things, there is an uphill battle in the world of connectivity and such a huge variety of necessary equipment to keep me connected and able to work. Accessibility and quality of network connections has been a seemingly insurmountable struggle as we don’t tend to travel to cities, but rather into the great unknown of the wild. As a result, I was left scratching my head with no answers to my biggest issue regarding fulltime travel … How To Get WiFi In An RV.
Enter the Winegard ConnecT 2.0 WIFI Extender. We knew we were going to struggle exponentially while on our Great Alaskan Road Trip, and so we decided to check out the most highly rated WiFi extender on the market. Following you will find a totally transparent review of the ConnecT 2.0’s performance in probably one of the most difficult travel locales on the planet for good, quality and full streaming WiFi.
Table of Contents
How To Install the WiFi Range Extender
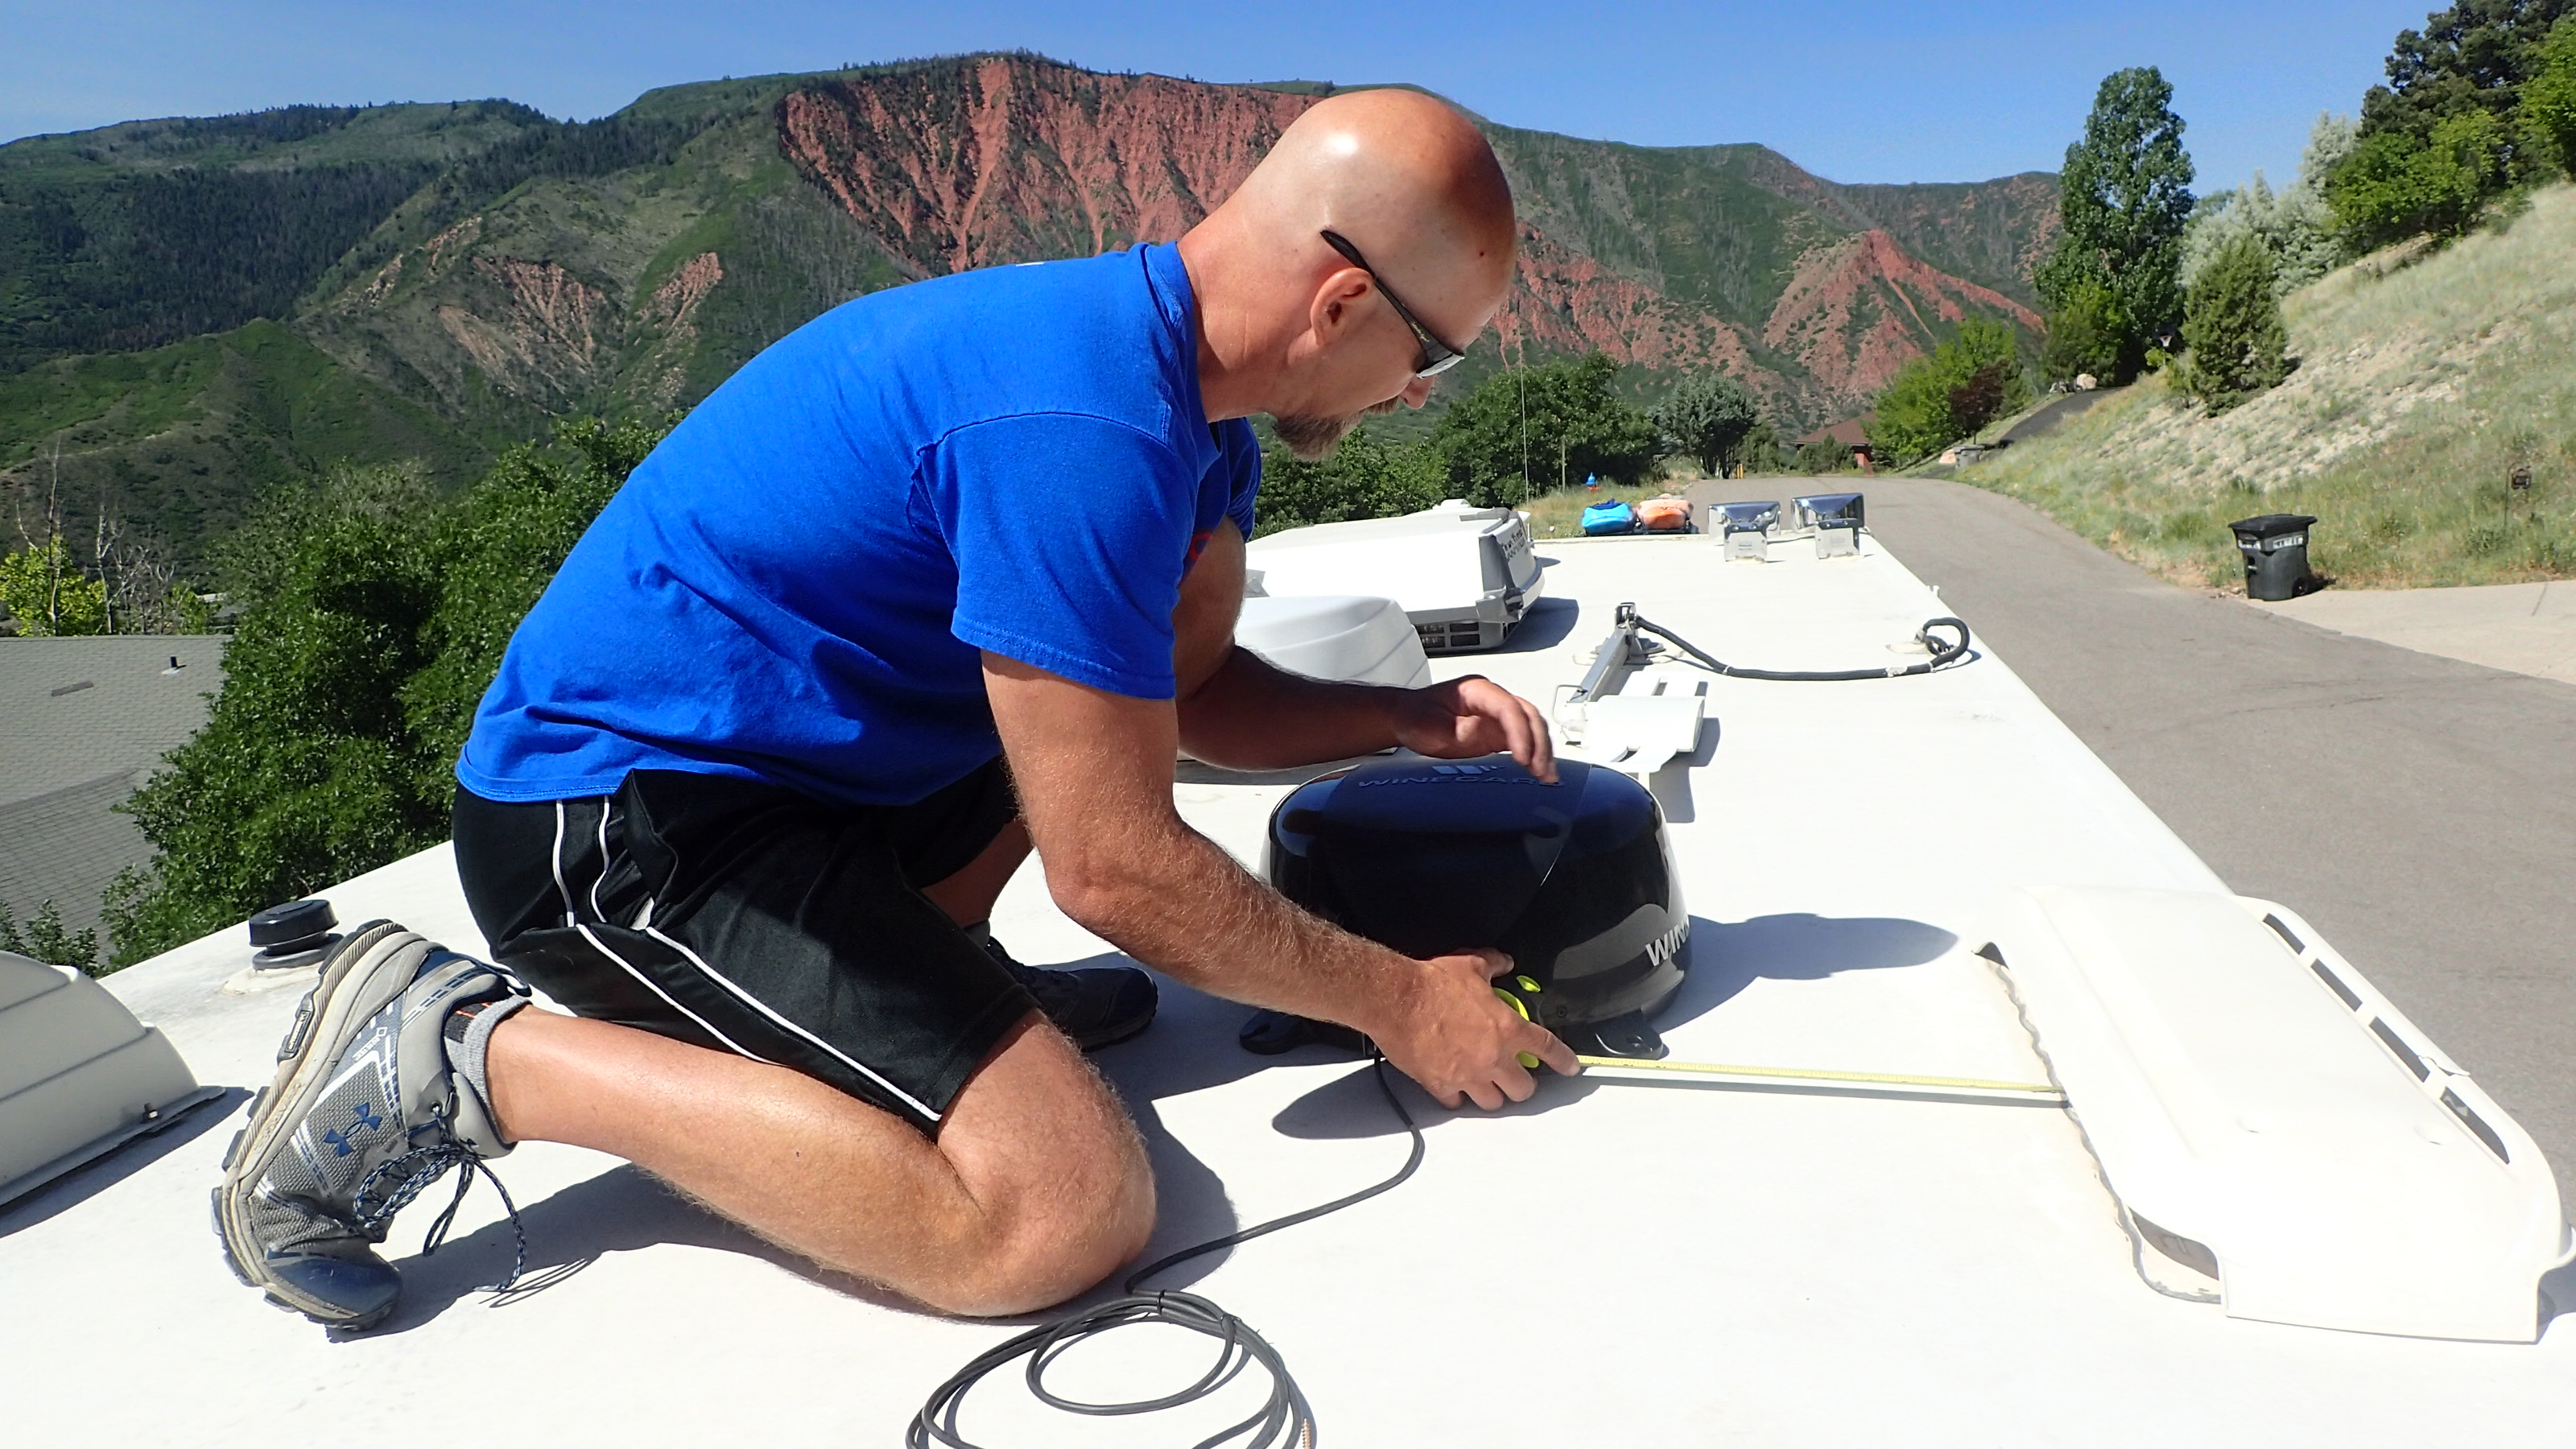
The Winegard unit itself was easy to install on our RV and the instructions were step by step and easy to follow. You will need a few tools and some basic skills to install the unit, but as long as you follow the instructions and take the time to plan your install location, you should have no trouble completing the install on your own.
- Drill and drill bits
- Hole saw
- Phillips screw driver
- Wire cutter/stripper/crimping tool
- Wire stripper
To install the unit, there are basically three components of the installation.
- Install the antenna on the roof of your RV.
- Install the power switch in the interior of your RV.
- Connect the power cable to a 12V DC power source within your RV.
Step 1 – Install the Antenna on the Roof of the RV
Before you install the antenna on the roof, you will need to determine the best location for the unit. It’s best to install the antenna in a location that is well spaced from other devices and with a clear line of sight. You will also need to determine where you want to drop the cable through the roof into the interior of the RV.
Install Location on Roof:
- At least 12 inches from other devices and from the edge of the roof.
- Parallel with the RV, with the cable exiting the back of the unit towards the rear of the RV.
In our case, we wanted to drop the cable into an interior wall, so we could mount the power switch in the wall. You could also mount the switch in the ceiling, in a cabinet, or in the dash. The unit comes with a 12 foot cable attached, plus a 20 foot extension, so you can mount the switch almost anywhere inside your RV.
Once you determine your location, you simply attach the unit to the roof with four mounting screws.
- Mark and drill pilot holes.
- Use an approved sealant to help adhere the feet and seal the holes.
- Attach the unit with the mounting screws.
Then you need to drill a hole for the cable and feed the cable through the hole into the interior of the RV.
- Mark and drill a hole for the power cable.
- Push the power cable through the hole.
- Use an approved sealant to seal the hole.
- Cover the hole with the cable cover plate. (Note: We didn’t use this, since it meant 4 more holes for the cover plate screws)
Step 2 – Install the Power Switch Inside of the RV
Before you install the power switch inside the RV, you will need to determine the best location for the switch and the location of your 12-volt DC power source. If your switch is located too far away from the power source, you may need to supply additional wiring from the power source to the switch.
Since there are so many different ways to install the power switch, we will only describe how we installed it. We dropped the power cable through our RV roof directly into the interior of a wall adjacent to our refrigerator, which had a 12-volt DC power source under it that was accessible through an access panel.
Install the Power Switch:
- Cut a hole big enough for the back of the switch to recess into the wall.
- Drill pilot holes for the mounting screws.
- Attach the switch using the mounting screws.
Step 3 – Connect the Unit to 12-Volt DC Power
The final step to install the unit is connecting the power cable to a 12-volt DC power source inside your RV. Make sure you turn off the power source before connecting the wire to the unit. Then connect the wires to the switch using the included connectors and a crimp tool.
- Connect the red wire from the antenna to the power switch.
- Connect a power wire from the power switch to the +12V DC power wire on the RV.
- Connect the black wire from the antenna to the ground wire on the RV.
It is recommended that you use a 3 amp inline fuse on the power wire from the RV to protect the unit.
Congratulations! Now your are ready to use the WiFi extender.
How To Use the WiFi Range Extender
The Winegard ConnecT 2.0 WiFi Range Extender is simple and easy to use. Simply power on the unit and it is ready to connect.
Step 1 – Connect a WiFi Enabled Device to the WiFi Range Extender
When you turn the rocker switch to the power ON position, this will turn on the antenna and the built in WiFi router, which is contained within the unit mounted on the roof. It may take a few minutes for the unit to boot up and for the range extender’s WiFi network to be visible from your WiFi enabled devices. When the network is available, connect your WiFi enabled device to the range extender using the unique SSID and password printed in your instructions.
NOTE: The default SSID and password are also printed on a label on the unit itself. (This may come in handy if you lose your instructions, like we did!) You can access the product label through a small cover plate on the back of the unit.
Step 2 – Connect the WiFi Range Extender to a WiFi Network
The WiFi range extender is controlled through a browser-based application. Open an Internet browser on a device that is connected to the range extender’s and enter 10.11.12.1 in the address bar of the browser. Enter the username and password on the Admin Login screen. The default username and password are both “admin”.
Before you use the Winegard WiFi range extender for the first time, you will want to do a few things to get the best experience.
- Upgrade the software.
- Change the network name (SSID).
- Change the network password.
- Change the admin password.
There are three simple steps to connect the WiFi range extender to a WiFi network.
- Scan for available WiFi networks
- Choose a WiFi network from the list of available networks.
- Connect to the WiFi network. You may need to enter a password or open a splash screen to connect.
Our Review of the Winegard ConnecT 2.0 WiFi Range Extender
The Winegard ConnecT 2.0 WiFi Range Extender did an amazing job scanning networks and finding many available networks. It definitely found way more WiFi networks than any of our phones or laptops could detect. It does a great job of listing out all the available networks and providing detailed information about each network, including the network security and signal strength.
From the list of available networks, you can easily see which networks are open and which ones have a strong enough signal strength. Winegard recommends connecting to a WiFi network with a signal strength of at least 50%, but we were able to connect to networks with weak signal strengths and still get them to work. However, if you want a good connection, you definitely want the highest signal strength you can get.
WiFi Hotspot Inside Your RV
We were able to connect to WiFi networks that were several hundred feet away. We didn’t have to worry about parking our RV too close to places that offered WiFi and were still able to get good connections. It is such a luxury to be able to connect to WiFi networks and use the Internet from within our RV rather than have to sit in a fast food restaurant or coffee shop for hours.
Unfortunately, in Alaska and Canada, free WiFi networks were few and far between. But we were able to buy a coffee, get the WiFi password, and access the WiFi from the comfort of our RV.
Even though it seemed our connections were usually slower than our cell phone network, we saved a tremendous amount of money on our data plans.
A Few Problems
We did experience some trouble connecting to WiFi networks and keeping the connection alive. But upgrading the software solved most of these problems, so we highly recommend upgrading the software from the start.
The Winegard will also remember WiFi networks and automatically reconnect. This can present a problem if your signal is weak, as the unit will disconnect and attempt to connect to a stronger signal. We got stuck in some endless connection loops, and had to disable auto-connect for some weak network signals.
It currently lacks a phone app to control the unit and requires that you open a browser to access the admin interface.
We Recommend It
Overall, the Winegard ConnecT 2.0 WiFi Range Extender has been a terrific addition to our arsenal of Internet devices to keep us connected while we travel full-time in our RV. It’s been extremely helpful for Dan to stay connected and work remotely as a software engineer. But, the biggest bonus has been for the Susie and the kids, since they now have access to FREE WiFi for research, Facetiming, videos and games. It’s also saving us a lot of money by minimizing the use of our mobile hotspot devices.
Hi Dan,
Thanks for the review and constructive comments. I wanted to let you know that there is an app available for the ConnecT now in case you want to add to your review. You can check it out at Google Play, https://play.google.com/store/apps/details?id=com.winegardcompany.WinegardDashboard or at apple store, https://itunes.apple.com/us/app/winegard-connected/id1331666670?mt=8.
Best,
Shelby DeWulf